To begin working on an Addon, it is recommended that you enable debug mode. This is referred to as "useDebug".
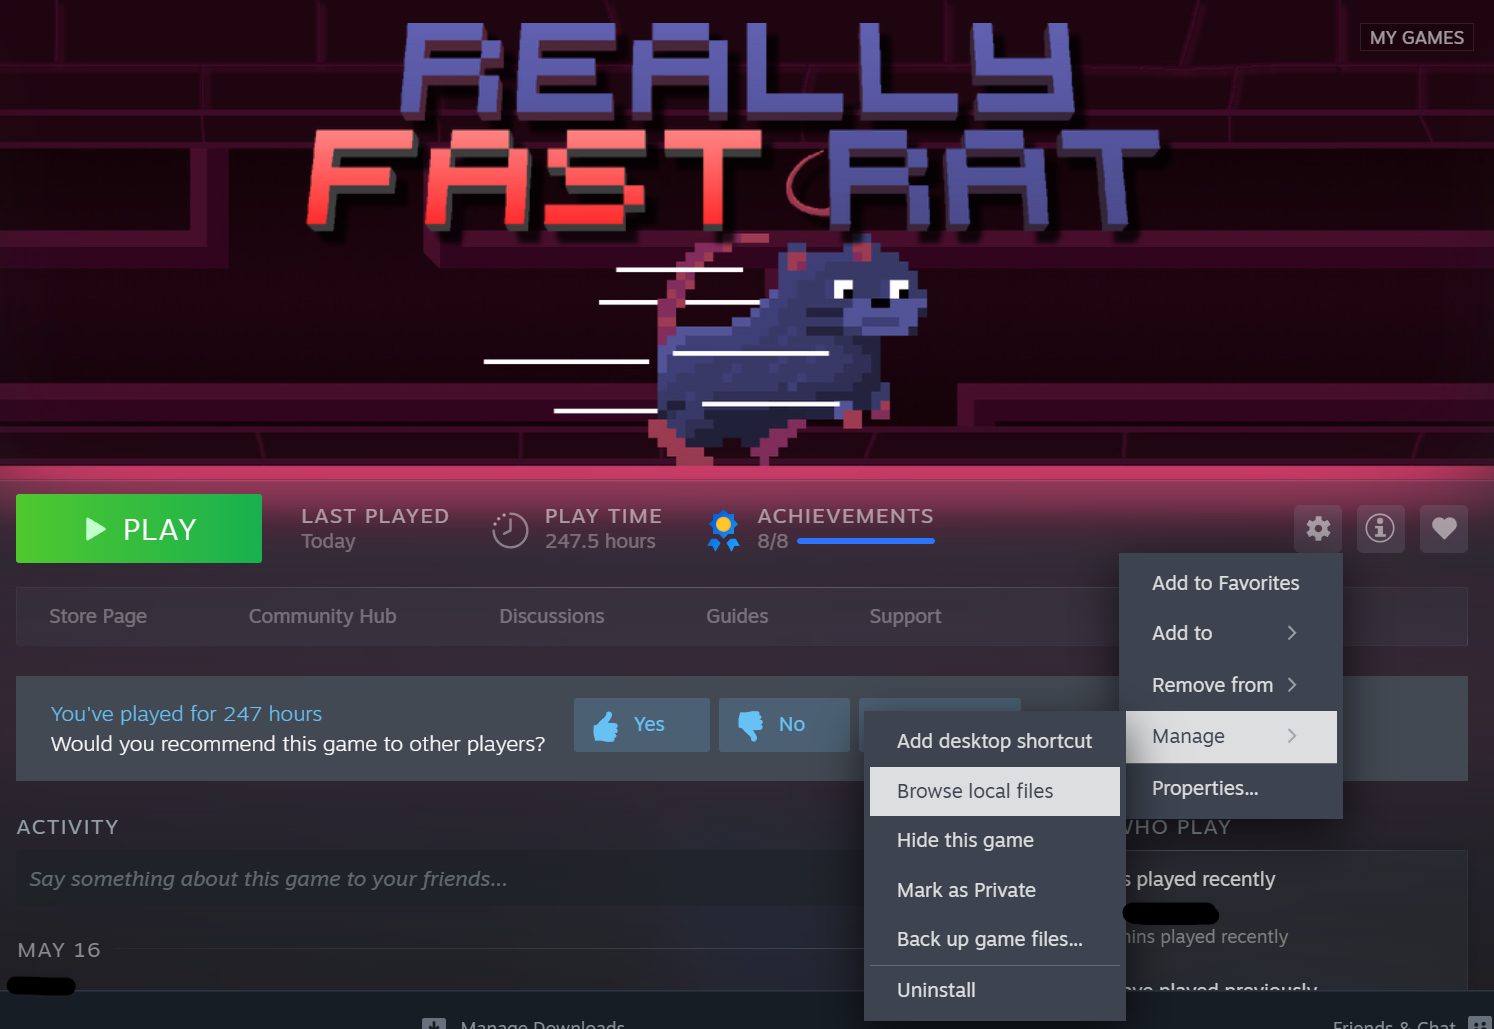
To enable useDebug, go to the folder where the game is installed. This can be found by going to the steam library page for the game. Then going "Settings>Manage>Browse Local Game Files"
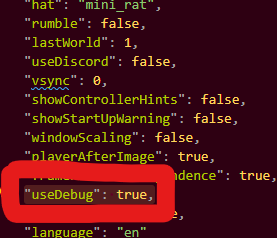
You should then be able to see a folder called "Data". If you do not, just open the game, and it should create itself. Close the game and go into this folder. Then open "settings.json" in some text editor. Find the line that has "useDebug", and make sure it is set to true. Case and syntax matter here, so make sure that line looks like the circled line below.
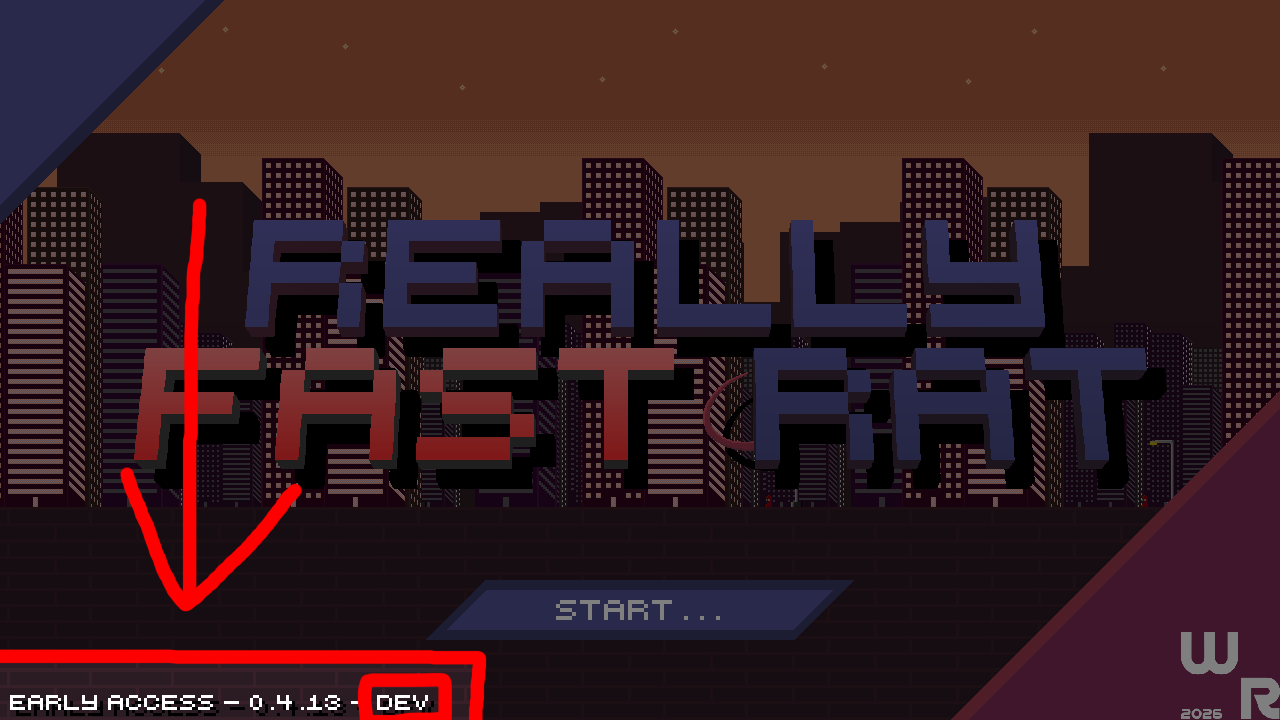
Open the game again. You know you have done it correctly when the version number of the game has "- DEV" beside it. The game should also skip the White Ruby title intro, and boot in windowed mode.
Congrats, you are now a developer! The next step is to develop something!
What to look at next:
Manifest
The manifest is required for the game to recognise your Addon. It contains all the information about an Addon.
You can automatically create one using the Creation Tool, but it is useful to know how it works, and what is inside, so if you need to make changes, it is easy for you.
{
    "game-version": [
        0,
        5,
        0
    ],
    "namespace": "BlackAndWhiteRat",
    "info":{
        "name": "Black And White Rat",
        "author": "Ruby",
        "description": "Makes the rat black and white! (So retro!)"
    },
    "instanced": false
}
We have several fields which we will tackle from top to bottom. The first is game-version. This tells the game what version this Addon was made for. In this instance, this Addon was made for version 0.5.0. The first two digits must match, but the last one does not have to. For example, this Addon could not be loaded in 0.6.0 or 0.4.0, but could be loaded in 0.5.1
After this is the namespace field. This is the id used for this Addon, as well as the name of the folder that it's unique data objects will be stored in. In this case, the namespace is BlackAndWhiteRat. Note that this does not use any spaces, or special characters.
After this is the info field. This stores another object inside it. Inside we have name, author and description. These are all just strings that can be whatever you want.
Finally there is the instanced field. This is a true or false boolean that controls whether or not this Addon should be instanced. Instanced Addons add unique features to the game, and run their own "instance". Noninstanced Addons just change existing features, and can be used with other noninstanced and instanced Addons.
If we look at the above manifest again, we now know what this Addon does. This is an Addon for 0.5.0, with a namespace of BlackAndWhiteRat. The Addon is made by Ruby, is titled "Black And White Rat", and is described as: "Makes the rat black and white! (So retro!)". We can also tell that this Addon does not add new features, as it is noninstanced.
Remember to place your manifest inside the root folder of your Addon. (ie, do not put it in a sub folder)
What to look at next:
Creation Tool
Before reading this, please read the Manifest page.
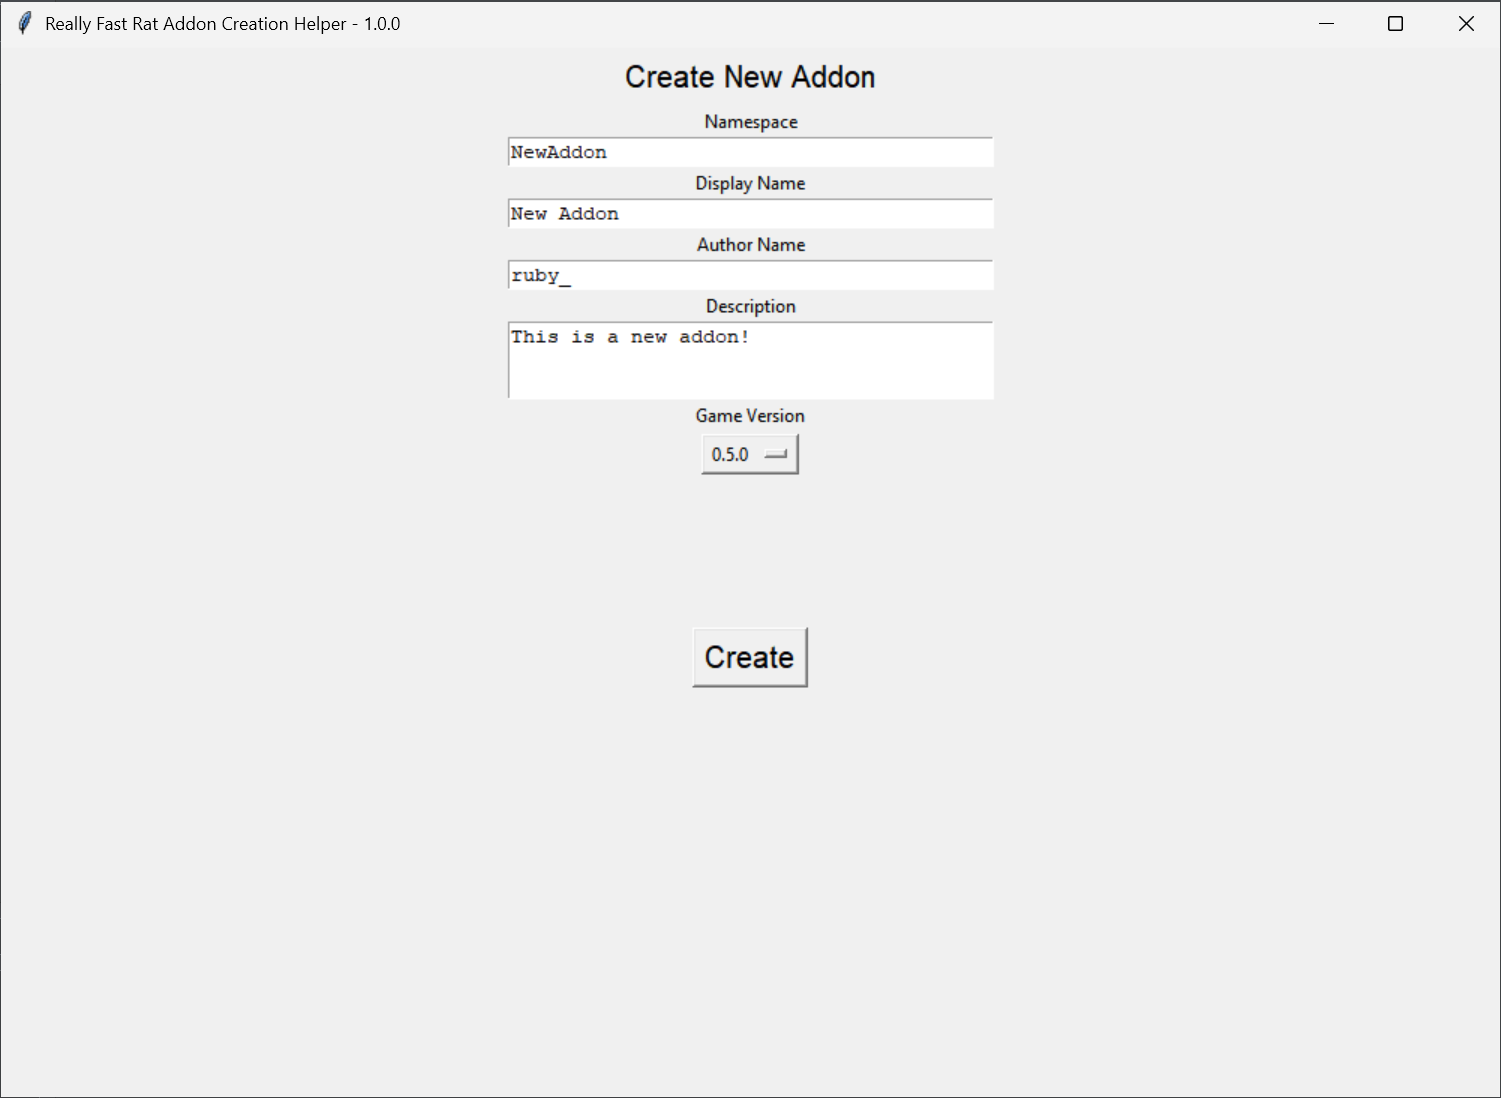
When you open the creation tool, you should see something like this.
Each field here relates to a field in the manifest.json. After clicking create, you will need to pick an empty folder to put the Addon inside. This will then create the layout for the Addon, including the manifest.json, Assets folder and namespace folder.
What to look at next:
Changing Textures
Before reading this, please read the Creation Tool page, and follow it so that you can have a base Addon folder.
Let's make an Addon where we replace the player textures.
To figure out what textures we need to change, open the game folder. You can do this using the folder command in the console. Enter the Assets folder, and look for what you want. For us, the textures are in the "Assets/player" folder. With this knowledge, we can go back to our Addon folder. If you used the creation tool, then the Assets folder should already be there, otherwise just make a new folder called "Assets". Now, inside there, replicate the folder structure from the game files. For this Addon, we just need to make a folder called "player". Note that you can include several folders, but for this sample we just need one. Now, copy all the texture from the player folder, to our version of the player folder. Make sure these textures are COPIED and not MOVED as this can cause issues. When this is done, you can edit the copied assets. When you are done, open the game, and drag and drop the manifest.json onto the game window. If we play the game, the player should be normal and unchanged. If we now open the console and type addon load noninstanced <YOUR NAMESPACE> and press enter. The player textures should have updated to our new ones. (Note that some textures might require a reload to change).